Saturday, August 18, 2012

Balloon Tutorial....

Meant to have this done earlier but with my end of quarter for summer (which was insane) and me getting a total knee replacement, it got put by the wayside for a bit, but I finally got it done! I used Copic markers and will list all of the colors I used for the balloons at the end of the tutorial.
So, without further adieu......here it is!!

Steps 1 & 2:
I didn't take a pic of step 1....That is to take a regular pencil and lightly draw in the rest of the balloons. 
Step 2 is to color in the knot of the balloon and the edges with the darkest color of that balloon....in this case I used V17.
Picture a balloon and notice how the edges are always darker than the center since the light cannot come through the edges the same way it comes through the middle.


Next use the next lightest color V15 and color in more of the balloon while leaving the center uncolored. 


 Using the lightest color V12, color in the center and blend all the colors together. 
Start coloring another balloon...coloring the knot and the edges. I did not color the edge where the purple balloon overlaps since the purple balloon is actually covering the edge that would be dark on the pink balloon. I used RV55 for the darkest pink.


Color in more of the center with the lighter pink RV52.


 I finish up the pink balloon with RV00 for the lightest center and to blend the other colors all together. 


 Next I color the green balloon starting with YG17. With this balloon I colored all the way around the inside using thinner lines where the overlap of balloons are. I just wanted you to see you can do this and it will still look ok if you use light colors and thin lines. 


I used YG13 for the lighter green.


I have went and colored all of the other balloons but you can see how the green looks a bit darker by the yellow, pink, and purple balloons where I added the darkest color all the way around the edges. 


Now.....to give the see-through look of the balloons. take the lightest color of each set of colors and color on the light pencil marks you have already put in. Lightly color on the balloon that is over the balloon under it....color almost all the way to the edge leaving the edge the original color of the balloon on the top. You will see how it will add just a slight bit of color on the balloon on the top and make it appear as if you can see though the balloon to the balloon that is floating behind it. I then took a white gel pen and colored in the reflection marks to cover up any spots that I went inside the lines.

Practice on some balloons before you color the entire image....just in case you are not happy with them. 
You can always email me if you have any questions. 


Here is a pic a little farther away.
My image is a digi from Mayzy Art called Bibi Balloons


Copics used:

Blue: B00-02-05
Yellow: Y11-13-15
Orange: YR61-65-68
Green: YG11-13-17
Purple: V12-15-17
Pink: RV00-52-55
Blue Green: BG70-72-75

Have fun coloring....I am going to finish up Bibi so I can share her completed. 

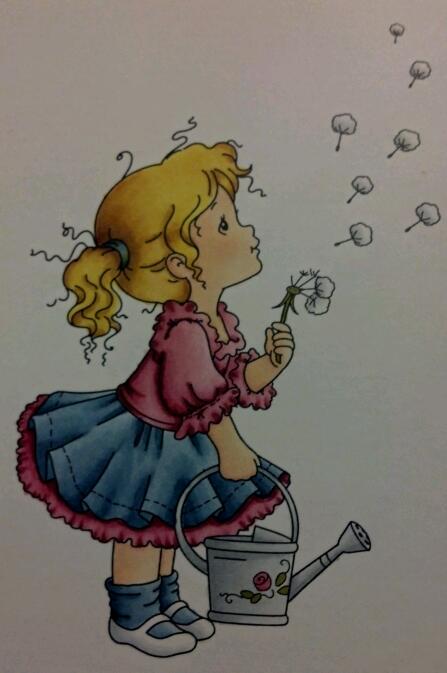
and......here she is all colored up and ready to be placed on a card!!
Thanks for stopping by! :o)


Tuesday, July 31, 2012

Booby Love....

This is an entry in a Saturated Canary challenge....black and white with one color allowed. 
She is called "Booby Love" 
I am going to make a couple cards for 2 of my sisters that walk in the Susan Komen walk every year.


Monday, June 25, 2012

Simply B Card...

As I promised....here is the card I put the simply B image on. I hope the recipient likes it! I cut the additional items from my Cameo and used Crackled...cover-a-card stamp from Impression Obsession for the background stamp. The sentiment is from Penny Black.


Saturday, June 23, 2012

Simple B....

This is an image that I just love from SimplyBStamps
(formerly SimplyBetty)
I am actually going to put this image on a very specific card and I will post the finished product when it is all done!! 


Thursday, June 21, 2012

June Card Class....

Hi all! I just wanted to share my cards that I am presenting to my local LSS, Scrap Happy Ohio, for a June card class. I love how the first cards opens and presents itself. You can't see it in the pics but the inside has the same stamp stamped in the lower right corner to decorate the inside a bit. The stamp I used on the oval is from Penny Black-Butterfly Kiss. the background stamp is from Impression Obsession-Flourishes.


I had fun doing this card! I used an Impression Obsession stamp on the background-Crackled. On the front piece I stamped a Penny Black stamp-Awakening on a piece of whit card stock with Versamark and embossed with clear embossing powder (white will work as well). Then I rubbed Tumbled Glass Distress Ink over the image and inked the edges with Vintage Photo. After that I cut my paper in half vertically and into 3 equal cuts horizontally. I pop dotted those pieces with space in between the pieces. I topped it off with a butterfly punch from Martha Stewart-Monarch Butterfly Large Double Punch and a white bow...SIMPLE!!!


Now this card....I got the idea from Annette Green...thanks, Annette!! :o)
This card is actually made out of a paper lunch sack. It made a great card!!! The front image is, once again, Butterfly Kiss from Penny Black (love that stamp!!) The edger punch I used is from EK Success and it is called Wavy Dotted Edge. The outside edge was cut with a Tim Holtz on the edge die-Brackets.

All of the card stock I used is from Authentique.....I love that company!!!


I divided the bag with staples to make 2 pockets for these tags...BEFORE I put the card stock on to cover the staples. The tags, I just cut to the size I wanted and, as all other sentiments, stamped with Penny Black Gratitude stamp set. .


That inside punch is a Martha Stewart punch Daisy Fan I just flipped it and punched the other side in contrasting locations...I love that!! The large tag is tucked into the bottom of the sack. It makes a PERFECT size for a gift card!! 


Here is my tag I had tucked away.


So, I hope you enjoyed looking at my cards!!
Until later....Happy Stampin'!!
....Sharon

Sunday, April 1, 2012

Rusty Truck

THIS is the reason I took the class from Suzanne Dean online! I saw her color this rusty truck and I just HAD to know how to do it!!!! She is wonderful! I love my truck!!

Before.....

After.....

Rusty Wheelbarrow

Before....


After.....


I had to but this online class from Suzanne Dean to learn how to color rust.
I love the look of it!!!!


Marci Angel XL...

I made her XL....and gave her to my LSS to display in the store
Marci is about 10" high....


marci angel card

YES!! It actually made it on a card!!!!
Angel Marci from La-La Land Crafts.


Fairies....

this is a digi download from wee stamps
I colored her in various colors....just playing around.


Sunflowers...

Can't recall whose stamp this is....will have to go look it up.....


more practice....black hair and pleats....

Practicing my black hair coloring....


My angels....

Angel Marci....stamp by La-La Land Crafts....
practicing my pleats....


My Momma's birthday card....2012

Happy Birthday, Momma!!!!


Scrap Happy bunny stamp...

This is an exclusive stamp that can only be bought at Scrap Happy in Tiffin, OH.


Barn....

Ok.....this is the 1st time EVER I have tried to color weathered wood.
I just kept looking at barns while my hubby would be driving and really
trying to "get" the look engrained in my brain so I could transfer that
to a colored image. I was actually quite pleased (and that rarely happens!)
stamp by rubber cottage....


Covered Bridge....

Trying to get this old weathered wood look down...
This is only the 2nd time I have tried coloring like this.
I am hooked!!!!
(stamp by rubber cottage)


Geranium...

I am stuck on coloring wood....trying to figure it all out.
I loved this stamp with the wooden bucket and the wooden handle.
Stamp by Rubber Cottage.


Wednesday, March 21, 2012

Copic Advanced coloring....including skin and hair

CLOTHES:

Start by laying down the darkest color (G02) using light, "flicking" strokes


Start blending by going over the darkest color and start flicking
 out a bit farther with the middle color (G00)


Continue with the same technique using the lightest color (G0000) until you are happy with the
 blending and you do not see the brush strokes from the previous colors.


Using the same technique start with the next color (YR23)


Now using the middle color (Y23), blend over
 the darker color and go out a bit farther.


Finishing up with the lightest color (Y15) blend over all
colors to blend them nicely and give a smooth finish.


SKIN AND HAIR:

For a light complexion, I start with E01 and flick
in around the edges and around the hairline.


Continue and bland with E0000. Put a little R11 to the cheek areas and blend out with E0000.
(See next picture to see how it blends in with a little pink in the cheeks).


Start by laying a VERY light line down where you want the highlights to be
....this will remind you not to color in dark in that area and give you a guideline.
I start color with the darkest color (E49)...I also use R11 to
give the lips a pink tint.


Blend out a bit with the middle color (E47)
being careful not to go too far into the "highlight" area.


Finish coloring with the lightest color (E25) and blend the colors together.
This is the finished image.


Sorry everyone....I was having trouble with my browser not being compatible with Blogger anymore....
so, following is the step by step to put the card together.....

This is your pieces....4 of everything except the 3 3/4" Kraft pieces, you will have 8 of those. 


I put white dashes on the score lines so it is easier for you to see them....this is placed so the textured side is up (the outside of the card).


You can fold in half first if it is easier to follow, but then fold UP the diagonal flap.


Here is the view with the diagonal folded up...


Put adhesive on the diagonal flap ONLY!!
The 4" black square goes on this flap. I do not have picture of the step-by-step of the kraft pieces, but I will step you through them. 


After you adhere the black 4" square, ink up the edges of the kraft.....also, ink up the embossed piece so it stands out. The 3-3/4" kraft pieces are the base for BOTH the inside and the front of your cards. The PLAIN 3-1/2" kraft square goes on the inside, the embossed 3-1/2" square goes on the front. Make sure to pop-dot something on your circles so the card has something to catch on. How I did it was to put adhesive on the large circle and place it down flat lining up the edges in the bottom corner. I put the stamped kraft circle and black circle together flat and pop-dotted on the black piece so the card will rest against the black circle.
I hope you all enjoyed the class!!
(Sorry it took me so long to get this darn blog figured out)
Happy coloring!!!! :o)